One of my
objectives in researching period furniture
is to find designs simple enough so that lots of people can make them
for
themselves; I sometimes teach a class at Pennsic entitled “Portable
Period
Furniture You Can Build in Your
Dorm Room. My first version
of the Cluny table
was somewhat simpler than the original, since I left off a number of ornamental
details that would have been difficult, perhaps impossible, for me to
recreate.
It was still quite a lot of work to build and a good deal of trouble to
assemble and disassemble. A
sufficiently talented and energetic college student
could probably build itin his
dorm room with the tools available to him—I know of one who built quite
an
impressive small siege engine under similar constraints—but it would be
a lot
of work.
For my second try, I did a bare bones
version—mechanically speaking the same table, but simplified down to
make it as
easy to build and as inexpensive as possible. Drilling a round hole is
a lot easier
than chiselling a square one, so I made the holes round. A dowel in a
drilled
hole of the right size makes a pretty tight fit, so I left off the pegs
that
held the posts into the sockets in the original. I made other
modifications
along similar lines, and used inexpensive softwood—2x4’s for the base
and
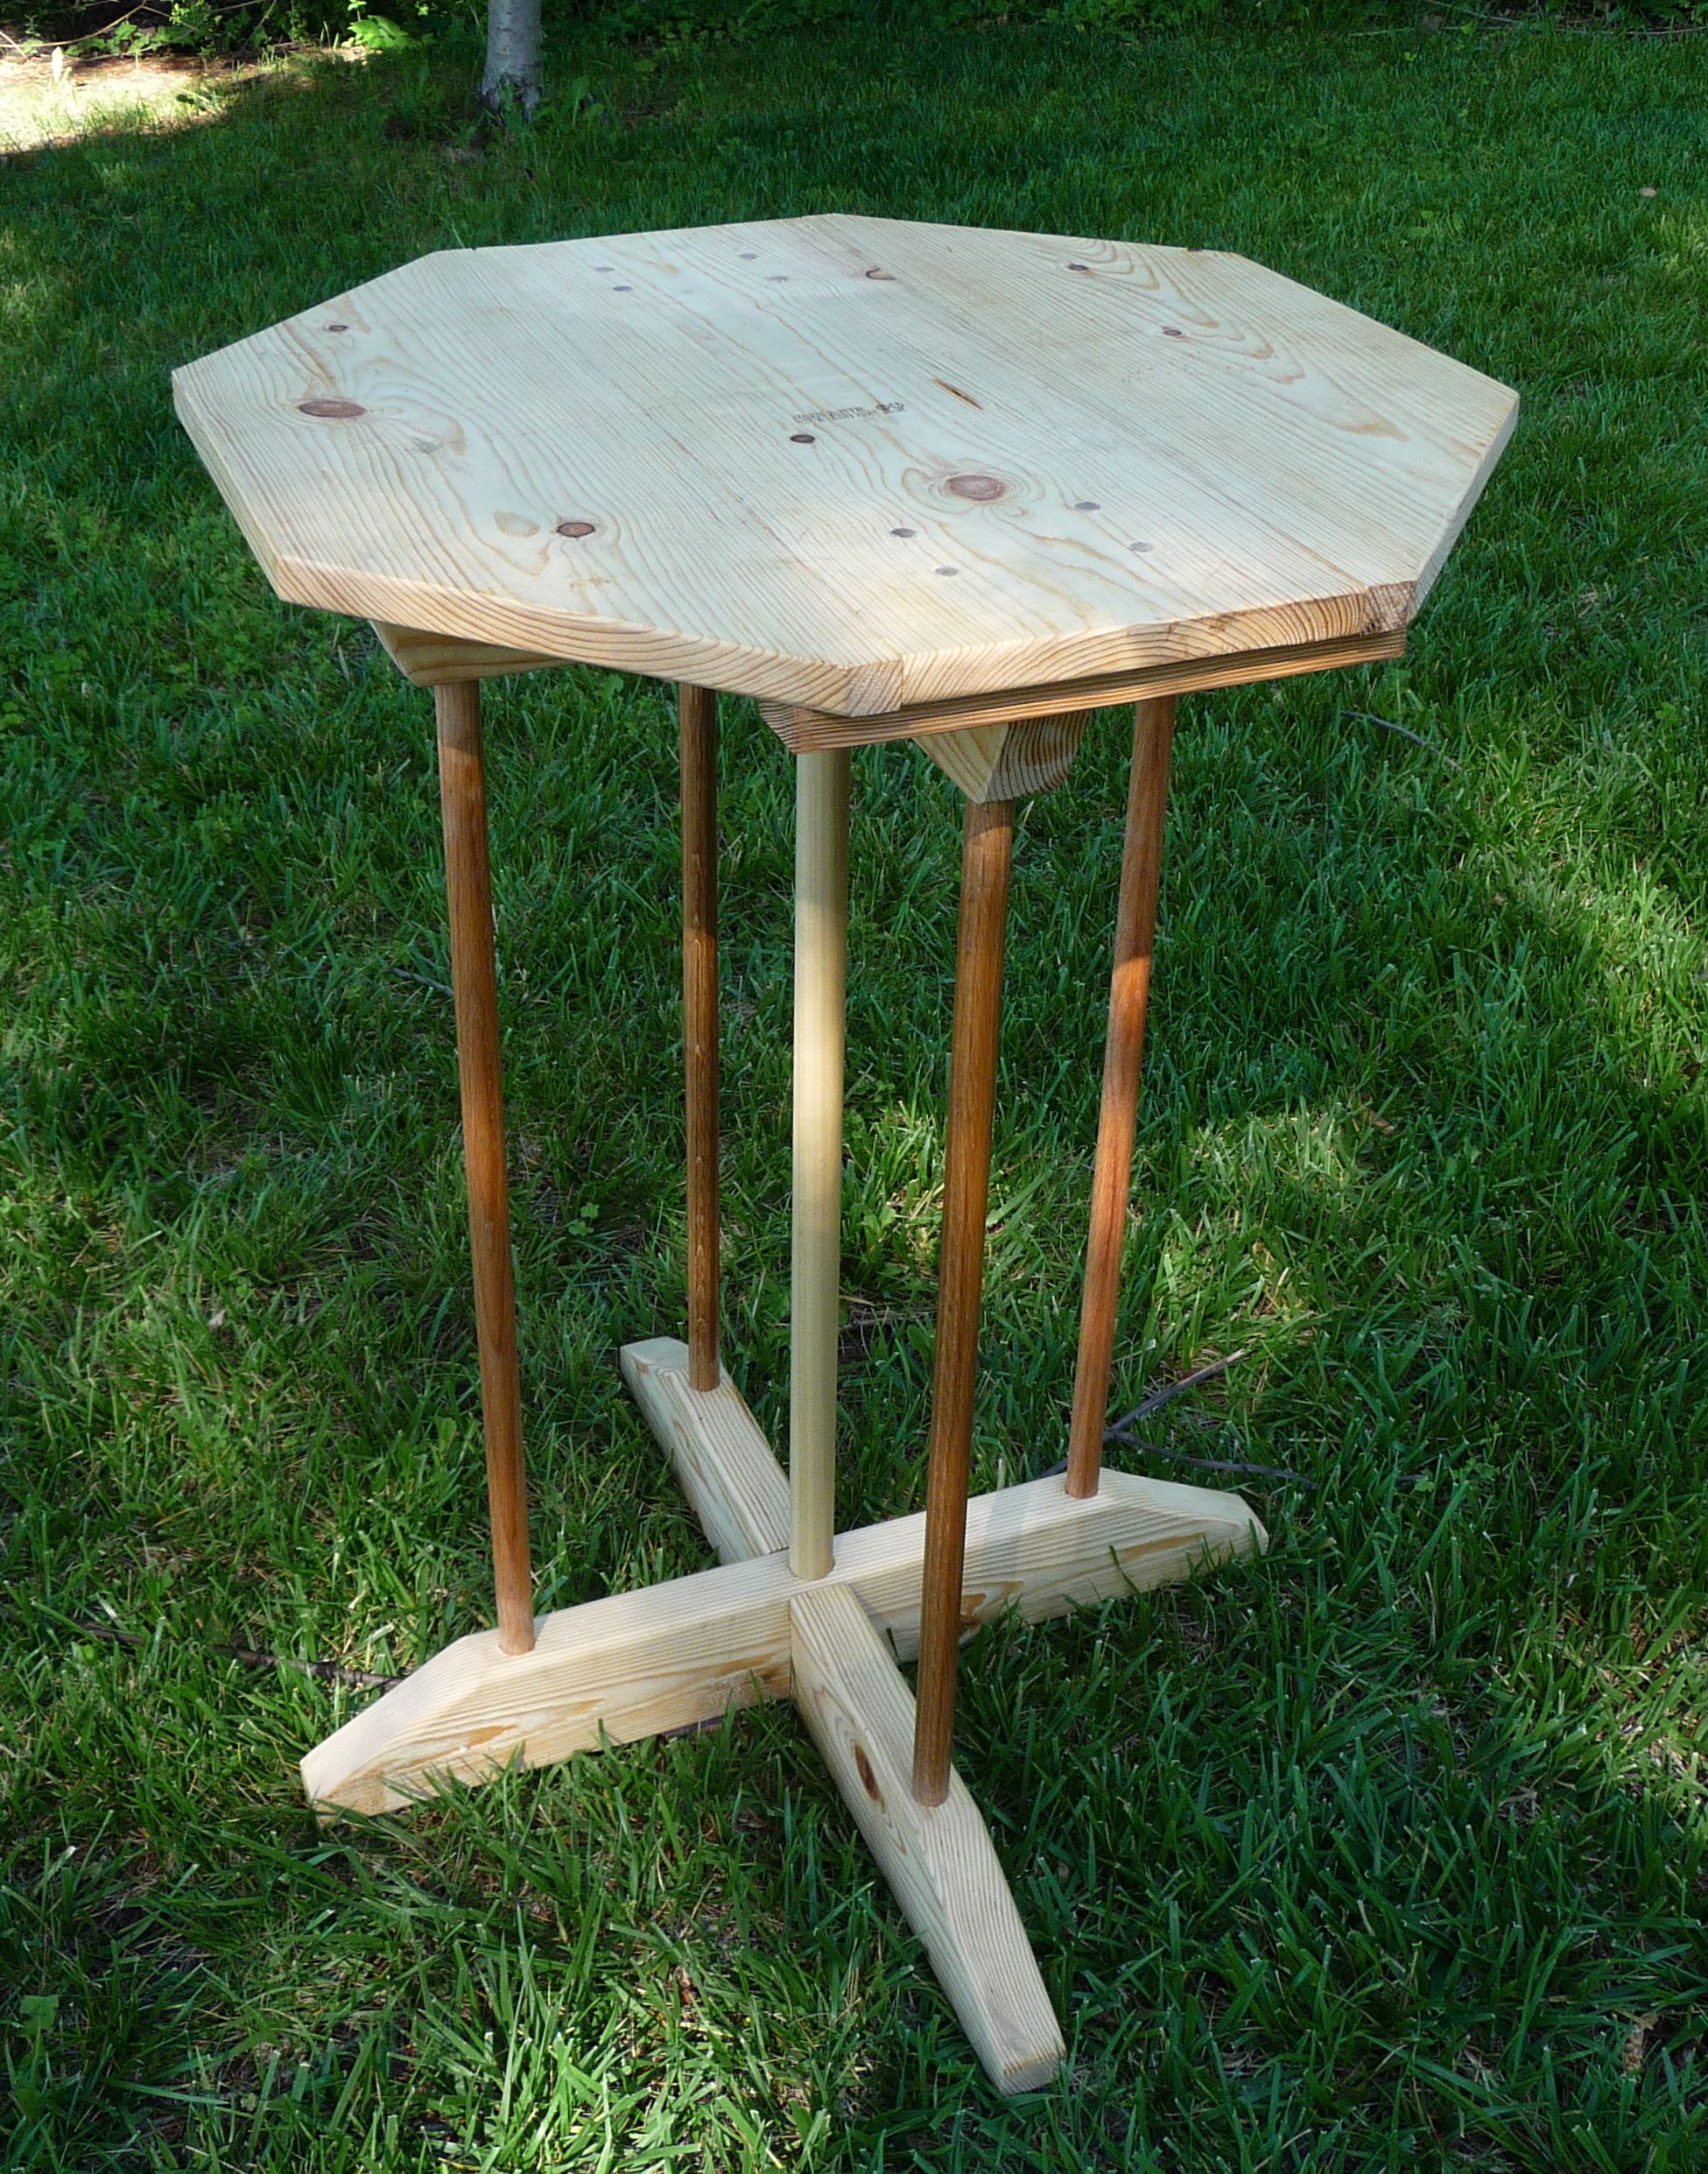
support, 1x8’s for the table itself. The result was a design that cost
less
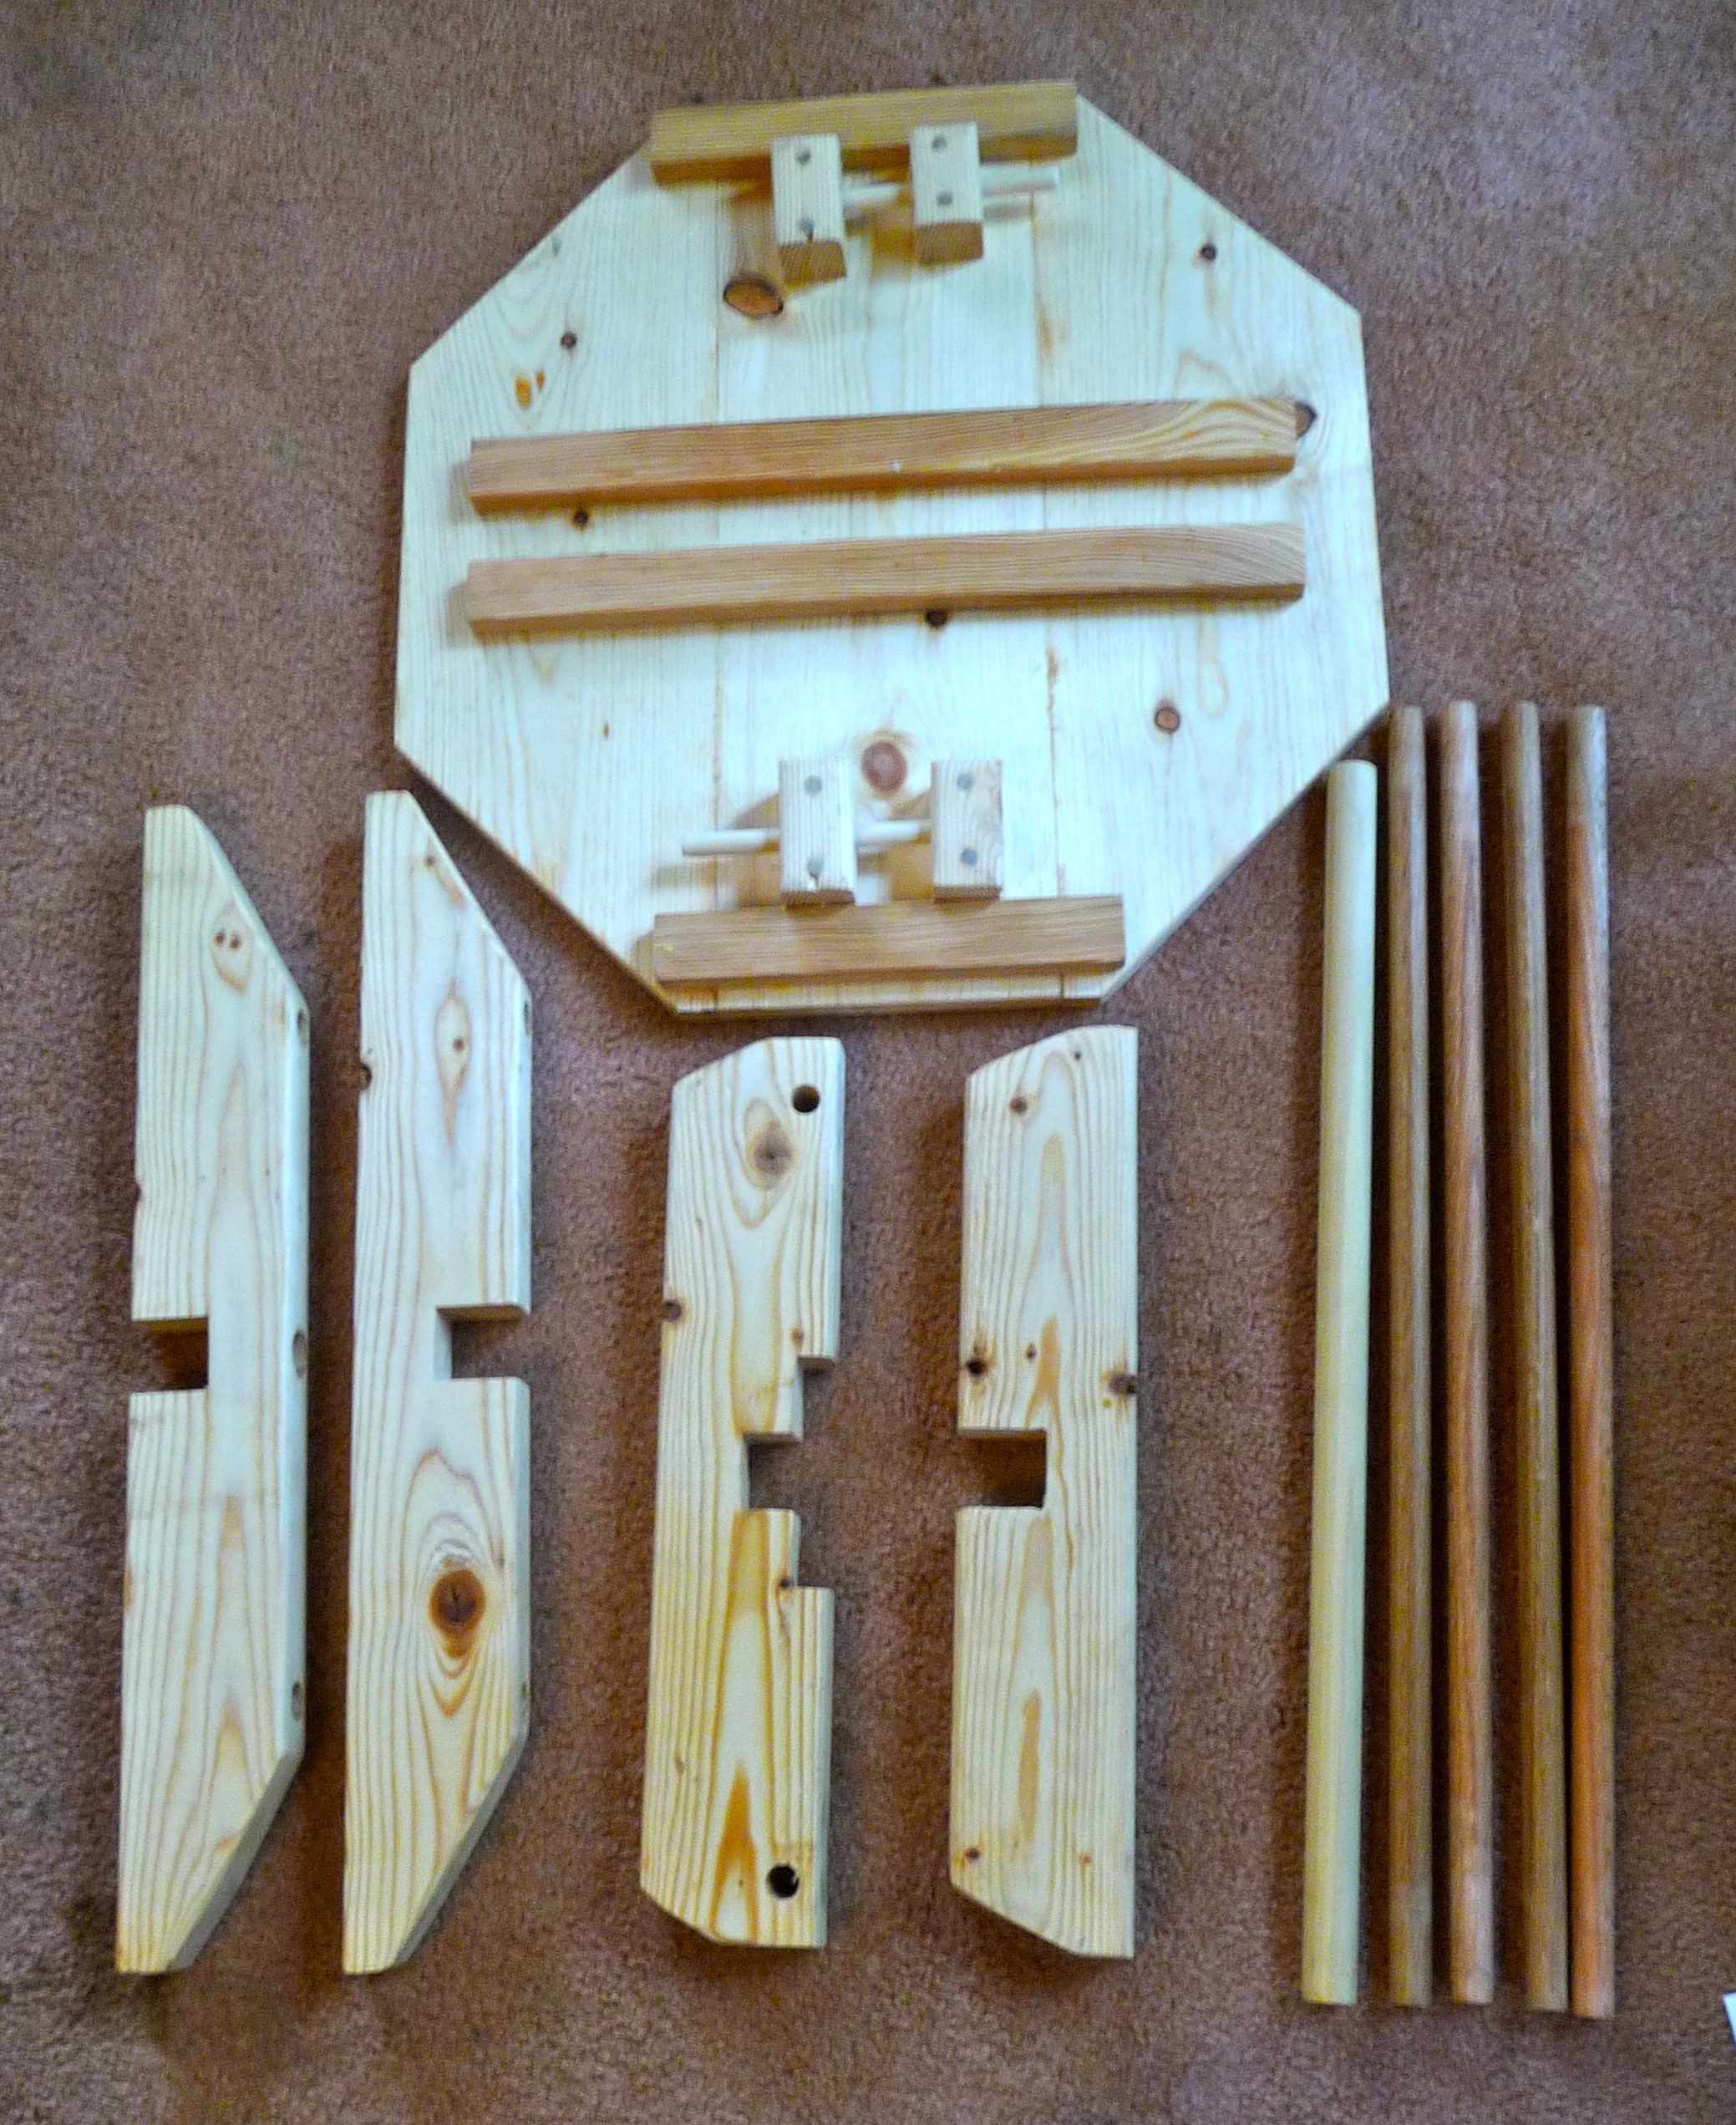
than $25 in materials and took about four hours to make. The figure
above shows
the assembled table, the two below showthe disassembled pieces and their dimensions.
The construction should be clear from the
pictures and
the previous article. The table top is made by gluing three lengths of
1x8 edge
to edge, with four additional pieces glued underneath for
reinforcement. It
could have been made from one piece of plywood, but although a little
less work
it would not look as nice. The tabs are glued to the bottom of the
table top,
with 3/8” wooden pegs as additional support. Each tab has a 9/16” hole
for a
horizontal peg, running through the ½” hole in the corresponding
support to
attach the table to the supports—I made the holes in the tabs a little
bigger
than the pegs to avoid having too tight a fit. A ¾” dowel in a
¾” hole makes a
pretty tight fit, so I sanded the dowels down a little at the ends and
rubbed
beeswax on them for lubrication.
The table is a little under two feet square.
It should
be straightforward to scale the design up to something that four, or
even
eight, people could eat around.
 One of my
objectives in researching period furniture
is to find designs simple enough so that lots of people can make them
for
themselves; I sometimes teach a class at Pennsic entitled “Portable
Period
Furniture You Can Build in Your
Dorm Room. My first version
of the Cluny table
was somewhat simpler than the original, since I left off a number of ornamental
details that would have been difficult, perhaps impossible, for me to
recreate.
It was still quite a lot of work to build and a good deal of trouble to
assemble and disassemble. A
sufficiently talented and energetic college student
could probably build it in his
dorm room with the tools available to him—I know of one who built quite
an
impressive small siege engine under similar constraints—but it would be
a lot
of work.
One of my
objectives in researching period furniture
is to find designs simple enough so that lots of people can make them
for
themselves; I sometimes teach a class at Pennsic entitled “Portable
Period
Furniture You Can Build in Your
Dorm Room. My first version
of the Cluny table
was somewhat simpler than the original, since I left off a number of ornamental
details that would have been difficult, perhaps impossible, for me to
recreate.
It was still quite a lot of work to build and a good deal of trouble to
assemble and disassemble. A
sufficiently talented and energetic college student
could probably build it in his
dorm room with the tools available to him—I know of one who built quite
an
impressive small siege engine under similar constraints—but it would be
a lot
of work.